Beginner Sex Rope Knots: The Two Ties to Know
If you're curious about rope play, you don't need to memorize a dictionary of sex knots before you get started. Most of the names you'll come across are variations on a relatively small group of basic ties, and two are especially useful for bondage beginners: the single column tie and the double column tie.
A single column tie goes around one limb, usually a wrist or ankle. A double column tie connects two limbs, such as wrist to wrist or ankle to ankle. Those are the two ties worth getting comfortable with first because they give you a simple starting point without turning your first experience into a knot-tying exam.
You'll run into a few other knot names as you learn more. A lark's head is commonly used to attach rope, while a half hitch can help secure a rope or connect a bound limb to another point. A square knot joins two ends of rope, although it isn't a universal solution for every situation. The taut-line hitch creates an adjustable loop that can be tightened or loosened, which is why you'll sometimes see it used around a wrist.
You may also hear the terms shibari and kinbaku when looking at Japanese rope bondage. They're associated with the more elaborate, decorative style of rope work you may have seen in photos. You don't need to learn that vocabulary, or recreate an elaborate rope pattern, to enjoy simple partner play. Start with a tie you can perform, talk through what you're both comfortable with, and make sure you can get the rope off quickly.
For now, leave suspension out of the equation. Suspension means supporting some or all of a person's weight with rope, and it introduces risks and skills that go well beyond tying someone up on a bed or the floor. This guide stays at ground level, where you can focus on learning the basics, communicating with your partner, and getting comfortable with the rope.
Before You Tie: Consent, Safewords, and Safety
The conversation before the rope comes out is what makes everything after it easier. Before you tie anything, talk about what's on the table, what's off-limits, which parts of the body are okay to tie, and how long you both expect the scene to last. Talk about what you'd like to happen afterward, too. Decide who is responsible for keeping the safety shears close by, and make sure you're both comfortable with the plan.
That conversation isn't a mood killer. If anything, knowing what to expect can take away the uncertainty and leave more room for anticipation.
Agree on a Safeword or Signal
Choose a safeword before you start, and make sure you both know exactly what it means. A simple traffic-light system works well: green means everything is good, yellow means slow down or check in, and red means stop.
A safeword doesn't have to be a word. If speaking could become difficult, agree on a physical signal instead. The person being tied might hold something they can drop to signal a stop, or you might agree on a specific pattern of taps or another sound beforehand. The important part is that the signal is easy to understand and that both partners agree to honor it immediately.
Keep These Three Rules
A few safety rules shouldn't be negotiable:
- Keep safety shears within reach. Have a pair of heavy-duty shears or another appropriate cutting tool close enough to reach immediately, even if you expect the tie to last only a minute.
- Stay together. The person doing the tying should remain with their partner for as long as the rope is on.
- Keep rope away from the neck. Never tie around the neck or throat, regardless of how loose or simple the tie seems.
The goal isn't to take the spontaneity out of rope play. It's to handle the practical stuff first so you can stop thinking about it once the fun starts.
Beginner Rope Types, Ties, and Gear
Choosing rope is easier than it sounds. The main things to consider are how it feels in your hands, how much grip it has, how easily knots stay in place, and how it feels against skin. There isn't one perfect beginner rope, so start with the material that feels easiest for you to handle.
Jute and hemp are traditional choices for Japanese-style rope bondage. They're grippy, which can make knots easier to control, but that texture can also be rougher on skin. Cotton tends to feel softer and more forgiving, making it a comfortable starting point for beginners. Nylon is smooth and durable, but it can be more slippery and harder to keep in place.
Rope also comes in different lengths, so think about what you're actually planning to learn rather than buying the longest option available. Start with a manageable length, get comfortable handling it, and add more as you learn.
How to Tie a Taut-Line Hitch
The taut-line hitch is a useful adjustable knot to learn, especially for creating a loop around a wrist. Here's how to tie it in four simple steps:
- Pass the rope around the wrist and bring the working end back alongside the standing part, leaving a loop that is comfortably loose.
- Wrap the working end twice around the standing part, working back inside the loop.
- Bring the working end outside the loop and take one more wrap around the standing part, passing it under itself to lock the hitch.
- Snug it down, then slide the hitch along the standing part to set the loop size, and confirm two fingers slip easily between the rope and the skin.
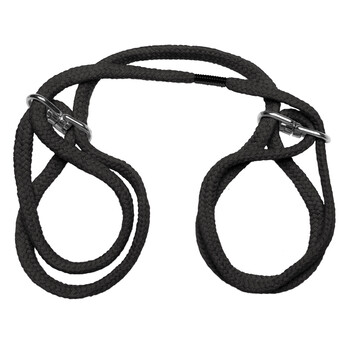
f you're intrigued by rope but aren't quite ready to learn knots, Japanese Cotton Rope Cuffs can be a nice middle ground. You get the look and feel of rope without having to learn a tie on your first try. And if you'd rather have several pieces together, a bondage kit can take some of the guesswork out of getting started. The Beginner's Bondage Fantasy set is one option to explore.
Whatever you choose, keep safety shears within easy reach whenever rope is in use. They're not an optional extra. They're part of the setup.
How to Stay Comfortable While Tied Up
The goal is for the rope to feel secure, not painfully tight. A simple starting check is to see whether you can comfortably slide two fingers between the rope and the skin. If you can't, loosen the tie. And don't judge the fit by how it looks—rope can appear perfectly placed while still putting too much pressure on one spot.
Once you're tied, pay attention to how things actually feel. Numbness, tingling, burning, weakness, or a limb that feels unusually difficult to move are all good reasons to stop and take the rope off. MedlinePlus notes that prolonged or repeated pressure around the wrist can contribute to radial nerve problems, including from restraints such as handcuffs. Cold fingers or toes and noticeable changes in skin color are also worth checking.
This is one reason shorter ties are a great way to learn. You can check in often, adjust as needed, and get a feel for what comfortable restraint actually feels like without trying to make your first session an endurance event.
What the Research Says
Rope bondage injuries are uncommon enough that the medical literature is still fairly limited, but the cases that have been reported are useful for understanding what can go wrong. A 2023 study described 16 injuries among 10 people, with the radial nerve in the upper arm the most frequently affected structure. Most of the injuries occurred during full-body suspension, which is considerably more advanced than tying someone on a bed or the floor.
The takeaway for beginners isn't that rope is inherently dangerous. It's that sustained pressure on a nerve is something to avoid. Keep the rope comfortable, check in regularly, and don't ignore changes in sensation just because the tie looks good.
If numbness, tingling, or weakness doesn't go away after the rope comes off, or if it extends into the arm, thumb, or first two fingers, contact a healthcare professional rather than simply waiting for it to resolve.
Don't Skip the Aftercare
Once the rope comes off, give yourselves a minute. Untie slowly, let the person who was restrained get their bearings, and help them stretch or move around comfortably before jumping straight into the next thing.
A drink of water, a blanket, a snack, and a few minutes of staying close together can be surprisingly good aftercare. Then talk about what worked and what you'd change next time while it's still fresh. That conversation is part of the fun, and it's one of the easiest ways to make the second time better than the first.
Finally, take a quick look at the skin where the rope was. Temporary rope marks aren't unusual and generally fade, but lingering numbness, weakness, or other unusual sensations deserve attention rather than a shrug.
What People Wonder About Rope Play
How much rope should you buy to start? You need less than you think. Start with one or two lengths, run a few wrist and ankle ties, and see what you actually reach for before adding more. It's easy to collect rope over time, but a big pile is not what makes a good first night.
What causes rope burn, and how do you avoid it? It's friction rather than tightness. Rope burn comes from rope dragging across skin at speed, so lay the rope on rather than pulling long lengths through, and slow right down at the point where you are drawing the slack out of a wrap. Softer fibers are kinder here if your skin is sensitive.
What if a knot will not come undone? Cut it, and don't feel bad about it. That is exactly why the shears are within reach, and it isn't a failure of anyone's knot skill. Cotton in particular can cinch hard under load, and picking at a stubborn knot while your partner is uncomfortable is the wrong way to spend those minutes. Rope can be replaced, and keeping your partner comfortable matters more than saving a length of it.
Can you do rope play by yourself? Only with something you can release instantly on your own, and never in a way that could leave you stuck if something goes wrong. If you want the restrained feeling solo, cuffs with a quick release are the sensible way to get it.
Is any of this shibari? Shibari and kinbaku are the Japanese decorative styles, and they're a real discipline that people study for years. Nothing in this guide requires learning them, and you can enjoy rope, texture, and one good wrist tie without ever tying a decorative pattern.
What happens if one of you wants to stop? You stop, right away, and no one owes anyone a reason. Then you untie, sit together, and talk about it later rather than in the moment. A night that ends early because somebody said yellow is still a night that went well.
Choosing The Right Bondage Rope
If you're starting with rope, keep it simple. The right rope is one that's comfortable to handle, easy to tie and untie, and suited to the kind of play you're planning. Cotton is a popular choice for beginners because it's soft and relatively easy to work with, while jute and hemp have more texture and grip. Nylon tends to be smoother and can slip more easily, so it may take a little more practice to handle confidently.
You don't need a giant collection, either. Start with one rope that's long enough for the ties you want to learn, feels good in your hands, and gives you enough control to work slowly. Once you've spent some time with it, you'll have a much better idea of whether you want something softer, grippier, or more textured.
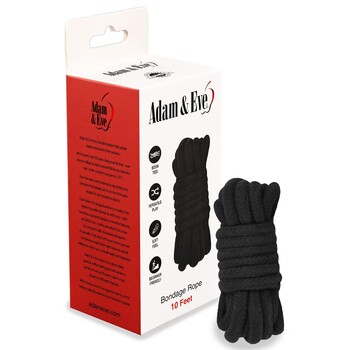
When you're ready to shop, Adam & Eve's Bondage Rope is a good place to start.
And remember the other essentials from the beginning of the article: talk first, agree on a safeword or signal, keep your safety shears within reach, and never tie around the neck. The rope is the fun part. The plan is what lets you enjoy it.
Explore even more and browse kinky bondage at Adam & Eve.